Example: installing tinc on Mac OS/X
This example shows how to install and configure tinc on Mac OS
X. The following was tested on Snow Leopard based system, however
should be generalisable to other Apple systems as well.
This document is intended to give a step-by-step instruction on how
to install tinc and how to configure it to be used as a basic
client for tinc server.
Overview and assumptions
The following documents is designed to allow you an easy and fast installation/configuration of tinc. It deals with the client side only and the assumption is that you have a tinc server configured and running properly.
Installing tinc
The recommended methods to install tinc is by using the macports port system. The MacPorts Project is an open-source community initiative to design an easy-to-use system for compiling, installing, and upgrading either command-line, X11 or Aqua based open-source software on the MacOSX operating system. Macports is recommended because it does not modify your system files. It keeps itself separate from your system.
MacPorts
XCode is a required prerequisite. It must be installed before installing Macports. Download and install the Macports system from MacForge.
- XCode (requires free online ADC Membership); it can also be obtained from original OSX installation DVD
- Macports
After Macports is installed, close and reopen your terminal. Update the ports system and ports list.
sudo port selfupdate
sudo port sync
This command will install tinc and all the necessary dependencies.
sudo port install tinc
Configuration files are located in /opt/local/etc/tinc.
Tinc can now be configured and executed.
Start tinc automatically on system boot
launchd is a system for monitoring services and make sure services are started if certain conditions are met. This system is available on OS X 10.5 and later versions.
To use launchd, you have to create a property-list file for tinc and put it under /Library/LaunchDaemons/
The following example is a plist file for the tinc network name: myvpn
/Library/LaunchDaemons/myvpn.tinc.plist:
<?xml version="1.0" encoding="UTF-8"?>
<!DOCTYPE plist PUBLIC "-//Apple//DTD PLIST 1.0//EN" "http://www.apple.com/DTDs/PropertyList-1.0.dtd">
<plist version="1.0">
<dict>
    <key>KeepAlive</key>
    <true/>
    <key>Label</key>
    <string>tinc.myvpn</string>
    <key>ProgramArguments</key>
    <array>
        <string>/opt/local/tinc/sbin/tincd</string>
        <string>-n</string>
        <string>myvpn</string>
        <string>-D</string>
    </array>
</dict>
</plist>
This will configure tincd to start the myvpn configuration in
the foreground (-D). If tincd is started as background daemon,
launchd will not function correctly with tinc. Launchd will
directly start tincd if this file is found. The
<key>KeepAlive</key> element will ensure
that tincd is always running, and to be restarted if it stops. To
stop tincd, use the launchctl command. Some commands to
remember are:
launchctl unload -w /Library/LaunchDaemons/myvpn.tinc.plist
This adds a disabled key to the file and stops tincd. The disabled key ensure that launchd will not start tincd anymore. The inverse operation is:
launchctl load -w /Library/LaunchDaemons/myvpn.tinc.plist
This removes the disabled key from the file and starts tincd.
To stop tinc:
launchctl stop tinc.myvpn
To list all services monitored by launchd:
launchctl list
If tinc has been configured with launchd, you will see tinc.myvpn listed with a process id.
Handle standby and other network interrupts
Tinc automatically tries to reconnect, but this takes time and the longer there is no connection, the longer tinc waits to try and reconnect again. A small tool is available at https://gitorious.org/tinc-on-osx/networknotify which will signal tinc to reconnect when the network connection is available. It uses OS X its network reachability framework and can be build using Xcode.
Alternative Installation Methods
There are two alternative methods of getting tinc: compiling it or downloading a precompiled binary. The second option (download it) - is easier and faster way of getting tinc to work.
Compile it
In the case of compiling tinc the following is required:
Before starting, create a new folder tmp in your
home directory and enter it (it can be any other location). From
Terminal level it can be done in the following way:

LZO
Download LZO (you can use wget or Safari to do it).
I used LZO version 2.03 (”lzo-2.03.tar.gz”). Using
wget:
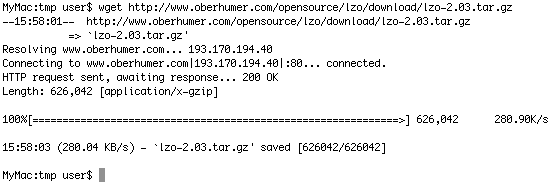
Unpack it, enter the directory:

And issue configure/make:

If everything goes well, after a few minutes the operation will
be finished, execute make install using root rights (using
sudo prefix):
![]()
Having installed LZO, we can install tinc.
Tinc
Download Tinc (again you can use wget or Safari to
do it). I used Tinc version
1.0.9. Using the same approach as before - download and extract
it:
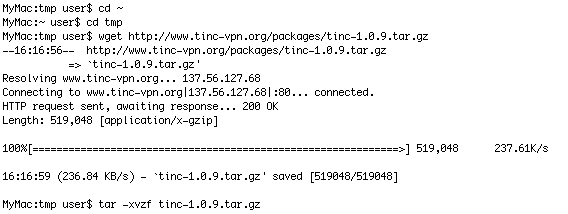
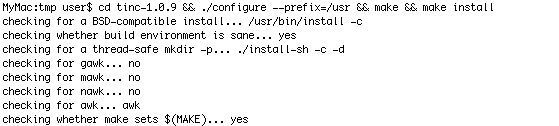
Enter the directory, and execute configure, make, make install:
Having installed Tinc, you can move to the next section.
Configuring tinc
Tinc on OS X looks for configuration files in
/usr/etc/tinc. In our case we will place configuration
files in ~/Library/tinc/. Navigate to your home
directory and create configuration folders for your
company (see manual for details). In my case it is
called myvpn.
![]()
For further steps the following assumptions are made: the server
to connect to has name myserver and the client we are
configuring: myclient0.
You will need to create the following files and folders within:
The sample files contain necessary explanation to make it work.
Make sure tinc-up and tinc-down are
executable:
![]()
You will also need to generate pair of keys (private/public) for your client. Do it only after the above files are configured properly! You will be asked for locations of certain files. The default locations are fine.
![]()
Once you are done, copy hosts/myclient0 file and
place it on your server in the same location
(hosts/myclient0). At this stage your client should be
able to connect to the server.
Starting tinc
To start tinc everything you need is to execute:
![]()
Tincd will issue a notice once it is successfully connected. For
more details on the syntax check tincd --help.
To stop the client you can kill it be executing:
![]()
Configuring tinc-up and tinc-down scripts
tincd-up and tincd-down are two files
that tincd executes on start of the service and on stop
respectively. They are usually used to notify system to use the vpn
as a default gateway. The files provided in the previous page are
minimalistic and used only to bring up and down the interface. If
you would like to tunnel all the traffic over vpn use the scripts
provided below. You have to modify them accordingly to your
configuration. Please see the notes inside them:
Please remember to rename the files to tinc-up and
tinc-down respectively and place them in your
configuration folder replacing the two existing files (if
applicable).
- Mike Bentzen (mike (at) bentzen . com . au)
- Grzegorz Dymarek (gd58 (at) alumni . st-andrews . ac . uk)
- wizztick